
 A note to self – Do not deviate from lesson plans that work well!!! Not ever! I got the bright idea from somewhere to let my classes make muffins from scratch the very first time they were in the lab. It was a big mistake. Don’t get me wrong. Their muffins were very good, it was just so hectic. They are not familiar with the people in their group. They know where very little equipment is in the kitchen. They are not familiar with the equipment. So no matter how smart and energetic my students are the first lab has to be something very simple to do. It’s too much for five group members times six kitchens. And please don’t let one group have what they think is an emergency and my assistance is needed in their kitchen. For example, an oven gets magically turned off or a glass is broken or the timer is hard to set!
Tag Archives: tips for baking
Top Chef APPLE MUFFINS
Filed under Muffins
Apple Muffins
 The first lab of the semester is coming up and there’s a lot of excitement in the air. I am keeping my fingers crossed that these students continue their enthusiasm the entire semester and that I can live up to their expectations. Today they were hanging on to my every word. Moving their chairs so they could see in the demonstration mirror at a better angle. Asking some very good questions. They were so engaged in learning. That is what I want every single day!
The recipe that we are using for our first lab is a variation of a basic muffin. I love it because the muffins are not cake which means they are not loaded with sugar. Most recipes that I have looked at lately have more than a cup of sugar for just a dozen muffins. That will put them at right over 200 calories a piece. Add chocolate chips or a sugar topping and it morphs into cake!
Filed under Muffins
Decadent Chocolate Cookies aka Pecan Mudslide Cookies

There is a bakery in Savannah, Georgia on Bay Street called B. Mathews Bakery. During the winter when it not as busy I have spent many Saturday afternoons enjoying a cup of tea and a chocolate cookie. Not just any chocolate cookie but one where the chocolate was so intense that I wanted to eat a dozen instead of just one. I have tried on several occasions to duplicate the recipe but I could never seem to get the same chocolate flavor. It is much the same flavor as in this flourless chocolate cake that I made last month.
Filed under Cookies, Cookies from scratch
The Snow and Voting for Your Favorite Decorated Cookie

This is why we did not have school last Friday. If you’re from the north I know that you are laughing, but 1/2 inch or more of this white stuff will shut us down for quite sometime. We head to the grocery store for bread and milk and whatever else is needed for being snowbound. It was beautiful while it lasted which was for exactly twenty-four hours. Just long enough for school to be called off for yet another day.
On Wednesday before the snow I demonstrated this to my class. With much enthusiasm on Thursday the classes baked their cookies to decorate on Friday. I heard them planning their strategy and who they were delivering their cookies to for Valentine’s Day. It would be their boyfriend, girlfriend, favorite teacher, or take them home to let their parents enjoy. But it did not happen on Friday! Then came our three-day winter break. Decorating Disappointment!!! Continue reading
Filed under Cookies, Cookies from scratch, frosting, Recipes, sugar cookies
Cornbread Muffins with Cheese and Chilies- another Paula Deen recipe

Today was a great day at school! Especially after yesterday. I was not sure I wanted to return. But, alas I did and have to say it was a fulfilling day at that. There are a few little projects needing some work, if you know what I mean. What would teachers do if every student was perfect? Some of my fellow teachers might say , “A lot!” But in the end it might be quite boring.
We visited the media center today to explore the world of blogging and how it related to Nutrition and Wellness class. As I monitored the class work, I glanced at the computer screen next to me and asked, ” How did you do that?” It really amazes me the computer skills that my students have. Now I am in the other seat. The slow learner!!! The student is so encouraging, ” Oh, Mrs. L let me show you how to do it. It is just a click here and that is it.” Now I am the student and he is the teacher. I feel excited about learning something new and it gave this kid a big smile.
Throughout the semester my class will be commenting on many of the posts. The instructions are different each time but always they are to use good writing skills. If you read the comments you will see that some are very good. Some on the other hand could use improvement.
Let’s get to the baby corn muffins. This is Paula Dean’s recipe. I just kicked it up a bit with some jalepeno peppers. They are quite easy to put together. I can’t lie and tell you that they are healthy, but it is all about the size of the portion. These are extremely small, just don’t eat twelve!
Depending what size pans you use you could possibly make 48. Don’t worry they freeze really well. To reheat just wrap in foil and place in the oven for about 10 minutes. They can be reheated in the microwave wrapped in paper towel.
Here’s how you make them. Enjoy!

Gather all the ingredients

1 1/4 cups of cornmeal and 2 teaspoons baking powder

Add 1/2 teaspoon salt
Then add 1 cup of sharp grated cheese, 1 8 oz. can of creamed corn, 1 cup sour cream, 1 4 oz. can chopped green chilies and I added 1 chopped jalapeno to add some heat.

Chilies, sour cream, corn and cheddar cheese are added then mix lightly.

Beat slightly 2 eggs and 1/2 canola oil and stir until combined. Do not overmix.

Put in greased mini muffin pan
Bake for 18 to 20 minutes. Just a note here about filling the pans. The ones above are filled just a little too much. It makes it very hard to get out of the pan. At first I thought that I should put oil around the tops of the pan. No!! This did not help. I did find that filling the pans 1/2 instead of 2/3 was the answer. It just did not look as if it would be enough batter, but it will work making them much easier to remove.

Enjoy!
Green Chili Corn Muffins
- 1 1/4 cups cornmeal
- 1/2 teaspoon salt
- 2 teaspoons baking powder
- 1 cup shredded sharp Cheddar cheese
- 8 oz. can cream-style corn
- 1 cup sour cream
- 4 oz. chopped green chilies
- 1/2 cup canola oil
- 2 eggs slightly beaten
Preheat the oven to 400 degrees F. Grease miniature muffin tins wih vegetable oil or cooking spray.
In a small bowl combine the cornmeal, salt, and baking powder. Add the cheese, corn, sour cream, and chilies. ( I stirred in minced jalapeno). Stir until lightly combined. Add the oil and eggs and stir until eveything is just combined. Do not overmix. The batter will be very stiff. Place about 1/2 tablespoon of batter into each muffin cup. Bake for 18 to 20 minutes.
Make 48 miniature muffins
Happy Cooking,
The Teacher Cooks
Sweet Potato Bread
 I love this time of year. Cool crisp mornings, the color of the autumn leaves in the sunshine, pumpkins, sitting by the fire, football , hayrides, hot chocolate, the smell of cinnamon, and nutmeg.
With this weather it just made me want to make something that would make the kitchen smell like fall.
So that is the reason for the sweet potato bread. At least one of the reasons, the other being that I have an abundance of sweet potatoes from the CSA that I have not used. I pulled out half of them for the bread and will use the rest for a fall root roast.
One year for Christmas a student brought me this bread all wrapped up real pretty for a gift. Now for those of you that aren’t teachers you might not understand this. Teachers have to be real careful when it comes to eating food that students bring you from home. You never know. You could have made Suzie Q real mad cause you called her mama for talking back to you or it just wasn’t fair that you sent her to the office because she was half dressed. Needless to say I am wary of eating anything that I don’t see made right in front of me. This little cute blonde I trusted her. No really I knew her mama real well. So here is the best sweet potato bread that has ever passed your lips. I promise you. Eat hot right out of the oven or freeze and eat later. Whatever you choose you are going to love it!
Coming from the south I have grown up eating sweet potatoes. Not sweet potato souffle. I hate that. Just plain sweet potatoes with butter and salt. There is nothing better. My grandparents grew these in their garden. As a small child I watched my mother with her apron on putting sweet potatoes in a brown paper bag and pushing them in the oven. I would help her peel them when they came out. It was almost like peeling a banana. I could not help myself from putting hot pieces in my mouth as we took the peelings off. They were so good.
You can do the same. Create some childhood memories with your family. Let them help you make this bread and maybe years from now they will be writing about how good it made them feel to be in the kitchen with you.

Sweet Potatoes ready to go in the oven.

Put in a paper bag on a baking sheet.
You have to bake them in a brown bag. Trust me. It helps to make the sugars caramelize. The taste is unbelievable. Bake at 400 degrees F. Bake until nice and soft for about 1 hr. and 20 minutes. It will make your house smell so good.
 Here they are right out of the oven. Soft skins and ready to peel.

Sweet potatoes peeled and ready to whip.

Whip hot potatoes with mixer. Do not add a thing. At this point you can refrigerate until you are ready to make the bread. Bring to room temperature or heat in the microwave for a few minutes.
 Cream 1 cup butter with 3 cups of sugar. That’s alot isn’t it. It will be allright.

Creamed butter and sugar . Ready to add the eggs.

Add 3 eggs one at a time. Beat after each one.

Add 1 teaspoon of good vanilla.
 Add 2 cups of whipped sweet potatoes.

Add Flour, cinnamon, cloves and nutmeg
At this point you can add nuts and/or raisins. I added both. About 1 cup chopped nuts and 1 cup of raisins.
Bake for 1 hour to 1 hour and 20 minutes. Check with toothpick that comes out clean. Cool for 10 min. before removing from pan.


I like this picture. It looks lonely. Ready for someone to eat.
Here is the recipe;
- 1 cup of butter
- 3 cups of sugar
- 3 eggs
- 1 t. vanilla
- 2 cups mashed sweet potatoes
- 3 cups plain flour
- 1 1/2 t salt
- 1 t soda
- 1 1/2 t cinnamon
- 1 t. cloves
- 1/2 t nutmeg
- raisins and pecans to taste
Cream butter and sugar. Add eggs 1 at a time. Add vanilla. Add 2 cups of mashed sweet potatoes. Add dry ingredients. Stir in nuts and raisins. Bake in a Bundt pan at 325 degrees for 1 hour to 1 hour and 20 min. Check for doneness with a cake tester or toothpick that comes out clean.
Happy Cooking,
The Teacher Cooks
Park Avenue Bars
 If you are watching your weight DO NOT make these bars!! They are so good you cannot stop yourself.
This recipe is from my friend Debbie. She is a great cook and is always bringing something good to school. I e-mailed her and said, ” I want that recipe for whatever you brought to school last Christmas. I cannot remember what’s in it . I just remember that it was delicious.” That gave her alot to go on. We are lucky to get this with that kind of information. In spite of my memory Debbie came through for me.
All right so I am baking these bars with very limited time. It is 10:00 and I have to take them to my tennis match by 2:00. Everything that could go wrong does. I pulled out the cake mix and the use by date had expired by 2 weeks. Just for me I would have used it, but with my luck no telling what would have happened!! Now a trip to the grocery. Thanks goodness I pulled out everything else that I would need including the pan. Oh, wait there is NO PAN. Forgot I had thrown it away. Just for your information don’t make lasagna in an aluminum pan because after so many years the tomato sauce will eat holes in it. So GI Joe is off to the store to buy a pan and a cake mix. He does not shop. He knows nothing about baking pans. After 15 minutes on the phone we settle for the heavy duty Wilton pan. Just remember that when you are baking in a dark pan to turn the oven down 25 degrees. I didn’t!! Almost burned! I did make it to my match on time with the bars and they were enjoyed.
Thanks to Debbie for the recipe . Here it is for you to enjoy, too.

1 stick of melted butter

Butter Recipe Cake Mix

1 egg

1 cup chopped Pecans

Mix with wooden spoon

Place in a 9 x 13 in. pan

Spread in the pan

1 box powdered sugar, 2 eggs, 8 oz cream cheese

Mix with mixer

Pour on top of cake mixture
When using a dark pan like this one make sure that you lower your oven temperature by 25 degrees. I failed to do this and they were very nearly burned!!!

Park Avenue Bars - Wonderful !
Here is the recipe. Enjoy!
Park Avenue Bars
- 1 Duncan Hines Butter Yellow cake mix
- 1 stick butter melted
- 3 eggs
- 1 cup chopped nuts
- 1 box powdered sugar
- 8 oz. cream cheese softened
Preheat oven to 350 degrees. Grease 9 x 13 in. baking dish. Mix by hand the cake mix, 1 egg, melted butter and chopped pecans. Press down into bottom of greased baking dish. Set aside. Mix well in mixer powdered sugar, 2 eggs, and cream cheese. Pour on top of crust . Bake about 40 min. (until the top is golden brown). Cool before cutting.
Happy Cooking,
The Teacher Cooks
Cream Puffs
 Teaching high school takes a lot of planning, but there are times that I do things on the spur of the moment that really add alot to the class. This is one of them. Today the students took a test and we started a new unit. I thought we needed something a little more interesting. This demo only took about 15 minutes of class time. While they were cooking the students took their test.
I have been making cream puffs since college. As a freshman I worked for the Family and Consumer Science Department Head. I thought I would be typing, grading essays that kind of thing, but that was not always the case. Thank goodness I loved to cook. She was in charge of every event that involved food. Not sit down meals, but everything else.
I left there knowing how to make every kind of cookie, sandwich, cheese straw, punch, and candy recipe. I loved it! It was so much fun and I learned a lot.
Here is one of the recipes that I made.
Cream puffs are very easy to make and will impress all your guests. You can fill them with pudding. I recommend you make it from scratch. It is much better than the instant that I used today, because of lack of time. Sweetened whipped cream would be an excellent choice, too. Let’s don’t leave out ICE CREAM. You could use that as a filling, too.
Since I am not a dessert person filling them with chicken or a seafood salad would be a hit. Or you could go all out and double the recipe and make one savory and one sweet. Whatever way you choose everyone is going to be impressed with your cooking skills.
My students now want to make these in class, but we don’t have time. We have to move on to more healthy choices. FRUITS and VEGETABLES
Here is the basic recipe that is found in every cookbook. Use your imagination and enjoy cooking!
Cream Puffs
- 1/2 cup water
- 1/4 cup margarine or butter
- 1/2 cup all purpose flour
- 1/4 teaspoon salt
- 2 eggs
Heat oven to 400 – 425 degrees. In a medium saucepan, heat water and margarine to boiling. Take off heat add flour and salt all at once. Stir vigorously until mixture leaves the sides of pan in a smooth compact ball. Let mixture cool slightly. Stirring will help to cool the mixture quicker. Be careful not to add your eggs too soon or you will have scrambled eggs. Add eggs one at a time, beating after each addition.
Spoon onto a cookie sheet lined with parchment paper. Make 6 very large cream puffs or use a tablespoon and make 20 snack size. ( In the picture are snack size).
You can pipe these from a pastry tube using a large fluted tip.
Bake small cream puffs for about 30 minutes. Bake large ones for about 40 minutes.
Doneness is important. They will collapse if they are underbaked. ( That question was on our test today) To fill them slice the top third and remove the uncooked dough if there is any. Now you will be able to fill the Cream Puff. When you finish just replace the top.
They should be filled as close to serving time as possible to preserve their crispness.
Unfilled they can be frozen for 3 months.
Happy Cooking,
The Teacher Cooks
Cheese Biscuits – Quick Bread Lab

Almost perfect!!!
I love teaching!! No, I mean I really LOVE teaching! Today anyway. It makes my day when my students come into the classroom and can’t wait for me to call the roll because they are so eager to get busy with their assignment . There has to be a reason for this other than the fact that they are all starving.
I read something on Monday when I attended the Leonardo DiVinci exhibit that could be the reason for the eagerness . Di Vinci said, ” Study without desire spoils the memory, and it retains nothing that it takes in.” Could it be a spark of passion here that has created this excitement? I hope so.
Cheese biscuits are the last of our quick bread labs and we go out with a perfect 10. As you look at the pictures you can see they did great! One group put the cheese in at the wrong time, but recovered very well. They learned from the first time not to add too much flour and surprisingly they were very good . We had a couple of equipment malfunctions. One oven was turned off by mistake and another did not heat properly.
I now feel as if our lab is a small reproduction of ” Top Chef” , because there is so much competition between the groups to be at the top of the post. It is quite comical. You would think that I am giving out money as an award. Competition is good, but I have to think of a way to tone this down before it ruins some friendships.
How do you prepare these little cheesy morsels? Check out Making Biscuits From Scratch and make one little change. Grate 1 1/2 cups of sharp cheddar cheese and add after cutting in the shortening.
Some information about grating cheese:
- Use a food processor
- Go ahead and grate a lot of it at one time
- Freeze what you don’t use
You might ask why not save time and use pre-grated cheese? I am not totally against it but, it is dry and not as flavorful. It is more expensive, too.
Okay I have to get to the gym . I ate more than my usual taste of each biscuit today. They were just sooo good that I could not resist. Hopefully I can STEP some of these calories off before they attach to my body as fat.
Enjoy the Bake-off pictures!
Happy Cooking,
The Teacher Cooks

Very Good
-
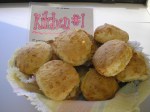
- Almost perfect!!!
-
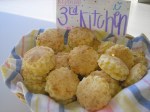
- These were great!
-

- Very Tasty!
-

- After my Heart!
-

- Good presentation
-

- Melt in your mouth good!
-

- Biscuits were very good!
-

- You always come up with something unique!
-

- These were yummy!
-

- This is quite an interesting presentation!
-

- Very Good
-

- These were so good!!
Cinnamon Rolls

Awesome Group Work!
The smell of warm cinnamon rolls permeated the halls of our school today. You can imagine how many visitors I had popping their heads or their bodies into my classroom to find out what we were cooking that smelled so delicious. This was the second time for my chicklets to use biscuit dough. They did very well. You can try these for yourself if you are in the mood for cinnamon rolls and do not have the time to make the yeast roll variety. These can be rolled out and cut in less than 15 minutes. Can’t you just taste them now along with a hot cup of coffee for breakfast? Come on, if you can make biscuit dough you can make these easily.
How do you make these wonderful rolls? Well, if you have mastered my post “Making Biscuits From Scratch” you can do this. After rolling out the dough into a rectangle a little smaller than a 9 x 13 inch pan, spread 1/4 cup granulated sugar mixed with 1 teaspoon of cinnamon. Here is a photo.

Rolled dough with cinnamon and sugar
- Starting on the long side of the dough roll the dough up tightly.
- Pinch the dough together when you get to the end.
- This dough is very forgiving. If it sticks to the wax paper just take a straight edge spatula and push the dough toward the roll. Pinch holes that you might make together.
- The diameter of the roll should be the same from end to end. Push the ends toward the middle to shorten the roll. This should help with the diameter.

Roll dough jellyroll style
Now here is a trick I learned from some cookbook. Use dental floss to cut the dough. Pull off about 10 inches and hold the floss the same way you would when flossing teeth. Place the floss under the dough and pull together quickly to cut. This will keep your rolls nice and round. See the photo.

Place floss under the dough and pull to middle

Cutting through the dough
Place in a 9×13 inch lightly greased pan. Bake at 425 degrees for about 15 – 20 minutes.

Place in pan to bake
When you take them out of the oven ice them with a heaping cup of powdered sugar mixed with just enough milk for the correct consistency. Usually it takes about 1-2 tablespoons. You can flavor with vanilla, lemon, orange, or almond flavoring. Serve hot.
Here is what we cooked up today. You take a look while I head to the gym after tasting 12 of these wonderful little things!!

These were very good!

You are all sweethearts!

These are bakery style!

I love your group effort!

Very Good!

Strawberry icing was fantastic!!!!

Excellent work!

Tasted very good!

Great! Where is the bacon?

Picture Perfect!

What a pan of rolls!!!
Happy cooking,
The Teacher Cooks
