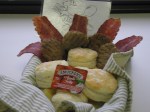
I have been baking as long as my mother would let me in the kitchen. Which was always. She was great about cooking as long as I would clean the kitchen. But, I only could bake. No main dishes or vegetables or anything like that. Why? I guess it was because baking to an extent is very cheap. Flour, sugar, eggs, milk and butter that’s about all you need. We were on a very tight budget. Sooo I have been baking for a long time. And you know I don’t even care for sweets that much. I just love to bake. Here is another recipe back in the day of the first few years of teaching. It is from Quaker Oats website. It no longer appears on the box.
First a few tips about baking cookies:
- Make sure that you use butter which I prefer or margarine for baking. Do not use whipped or low-fat margarine.
- Ingredients should be at room temperature.
- Butter should be soft, but not too soft or the cookies will flatten as they bake
- Use parchment paper on your cookie sheets. This saves time in washing cookie sheets.
- Find a good cookie sheet. Expensive is not always the best. A shiny cookie sheet is better than dull.
- Do not use your cookie sheet for any other food for example to make cheese toast .
- Be careful about the cooking time. You should know your oven. Does it cook quicker or slower than the recipe recommends?
- Just 1 minute more cooking time for cookies is a lot. Remember these are small little things!

Measure all ingredients separately

- Softened Butter and Sugars

Cream butter and sugar

Add egg and vanilla

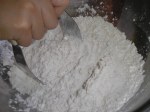
Add dry ingredients except oats

Mix well

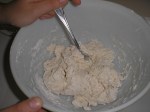
Stir in oats

Place on baking sheet with parchment paper
Quaker’s Best Oatmeal Cookies
-
11/4 cups butter, softened
-
3/4 cup firmly packed light brown sugar
-
1/2 cup granulated sugar
-
1 egg
-
1 teaspoon vanilla
-
11/2 cups all-purpose flour
-
1 teaspoon baking soda
-
1/2 teaspoon salt (optional)
-
1 teaspoon ground cinnamon
-
1/4 teaspoon ground nutmeg
-
3 cups Quakers Oats old fashioned
Heat oven to 375 degrees. Beat together margarine and sugars until creamy. Add egg and vanilla: beat well. Add combined flour, baking soda, salt and spices: mix well. Stir in oats: mix well. Drop by rounded tablespoonfuls onto ungreased cookie sheet. Bake 8 to 9 minutes for a chewy cookie or 10 to 11 minutes for a crisp cookie. Cool 1 minute on cookie sheet: remove to wire rack. Cool completely. Store in a tightly covered container.
Makes about 4 1/2 dozen
ENJOY!
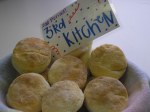
The Teacher Cooks