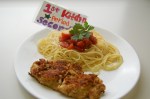
1st Block Kitchen 5
These last two days have been really crazy for me. Yesterday the local government station here came to film my class. Yes, they did!! I have never done anything quite like this. Years ago I was on WSB radio, but you know no one can see you. All you have to worry about is what you say. On TV you have to worry about how fat you look, or did you have a stupid grin on your face or if you have lipstick on your teeth and much much more. I was a little scared. No ! I was alot scared. My Tennessee friend called the day before to see if she could help with makeup and hair. I needed some mental help…….but I made it through without doing anything really stupid. At least I think I did. We’ll see when the broadcast is played for God and everyone to see . Oh my Gosh, I don’t know if I can stand to watch myself. I have never watched a video of myself. I’m too scared!!
Because there were six extra people in my room some of which had cameras or lights it was hard for my students to concentrate on my demonstration. At least that’s the excuse I’m using for why some of them had no clue as to what they were doing in class today. Now mind you 60% of them knew when to add the soy sauce or how to mince the ginger, but the other 40% were really struggling and I do mean struggling. I will say that they all finished in time to eat, clean their kitchens and get to the next class on time. That is a good thing!!! We are definitely discussing why it is important to know what you are doing before class. It was if someone hit instant replay on my name all morning. I must have heard it a million times!
This recipe is from Paula Deen”s first cookbook and it is delicious. Very Healthy!! Very Tasty!!
I did not take pictures yesterday. Too nervous and forgot! So today I took pictures as my students prepared their meal. Great job!!
This should make it easy for you to prepare for yourself and guests. Let me be the first to say that this recipe is going to get you a lot of compliments. No more Chinese takeout for you. By the way my perfume of the day was sesame oil and hot chili paste. I was a walking advertisement for my class.

Butterfly with kitchen shears

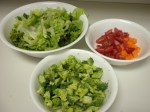
Slice a bunch of green onions

Slice a Yellow and Red Pepper

Need a bunch of broccoli Florets

1 1/2 tsp. minced fresh ginger

1 T Sesame Oil

1/4 cup Soy Sauce
I did not take pictures of two items. I was busy running around putting out fires. Not really, just helping the lost.
4 Tablespoons of Chili Paste
2 Minced garlic cloves

Cooking Chicken in Sesame Oil & 2 T chili Paste
What happened to this photograph? Oh my!!!!!!
We used an electric skillet for convenience in class. I recommend that you use a large skillet or wok. Do not worry about the paste turning a dark color and sticking to the pan. I panicked the first time I prepared it, but you will deglaze the pan in the end. The flavor will be incredible.
Take the chicken out after cooking about 4 minutes on each side. Let it rest 5 min. and slice with the grain into long strips. Let your husband, children, or guests do this while you finish the vegetables.

Keep Angel Hair Pasta Hot
The recipe calls for 1 lb. of angel hair pasta. I found this to be too much. The chicken and vegetables make about 6 servings so make pasta accordingly.

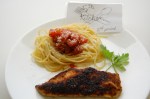
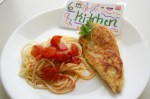
This looks so good!
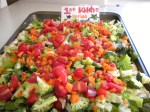
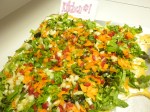
Add broccoli, onions, and peppers to the skillet as soon as you take out the chicken. Pour soy sauce, 2 T of Chili paste, garlic, and about 1/4 cup of water and cook vegetables until just tender.

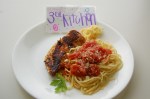
Good job slicing the chicken!!
Add the sliced chicken to the vegetables and serve over hot angel hair pasta. This is too good to be true.
Thanks to Paula Deen . Here is her original recipe.
Szechuan Chicken with Angelhair Pasta
- 1 tablespoon dark sesame oil
- 1/4 cup chili-garlic sauce ( I found this in the vegetable section of the grocery. It comes in a tube like toothpaste)
- 4 boneless chicken breast ( I butterfly them so they will be thinner and cook faster)
- 1 lb. of angelhair pasta ( I decreased the amount)
- 1 1/2 pounds broccoli crowns cut into florets
- 1 red bell pepper cut into strips
- 1 yellow bell pepper cut into strips
- 12 green onions thinly sliced
- 2 cloves garlic minced
- 1/4 cup soy sauce
- 11/2 teaspoons minced fresh ginger
- 1/4 cup water ( I added this especially if the skillet is hot a lot of the liquid will evaporate and you will need more)
Heat the oil and 2 tablespoons of the chili sauce in a large skillet over medium heat: add the chicken, and cook for 4 minutes on each side, or until cooked through. Meanwhile bring a large pot of water to boil for pasta. Add pasta to boiling water, cook as directed on package, and drain. Remove the chicken from the pan and cut it into strips. Add the broccoli, bell peppers, green onions, garlic, remaining chili sauce, soy sauce and ginger to the skillet. Cook the vegetables stirring until they are crisp tender. Add the chicken strips and cook until heated through. Serve over the pasta.
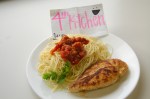
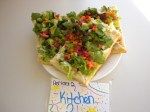
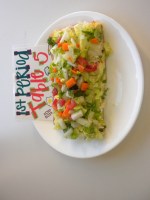
Here is the 2nd place winner of the Iron Chef!

1st Block 3rd Kitchen
Happy Cooking,
The Teacher Cooks